Prepare Photos That Fit Perfectly on a Frameo Digital Frame
A practical guide to choosing the right frame size, cropping without losing faces, fitting portrait and landscape photos, exporting at the correct resolution, and sending the finished image to a Frameo frame.

1. What causes awkward Frameo crops
2. Check your frame before editing
| Frame size | Tool preset | Aspect ratio |
|---|---|---|
| 10.1 inch | 1280 x 800 | 16:10 |
| 15.6 inch | 1920 x 1080 | 16:9 |
| 21.5 inch | 1920 x 1080 | 16:9 |
The presets above match the most common Frameo-compatible displays, but models vary. If your manual or settings screen lists a different resolution, trust that and pick the closest preset with the same aspect ratio.
3. Choose better source photos
- Use the highest-resolution original you have, straight from the camera or phone gallery rather than a chat app.
- Prefer photos with a little breathing room around faces — that spare margin is what a crop eats first.
- Avoid screenshots of photos and heavily compressed social-media downloads; they look soft once stretched to fill a frame.
- For a landscape frame, pick landscape photos when you can. It is the single biggest improvement you can make.
- Group shots deserve the widest original available, because everyone needs to stay inside the crop.
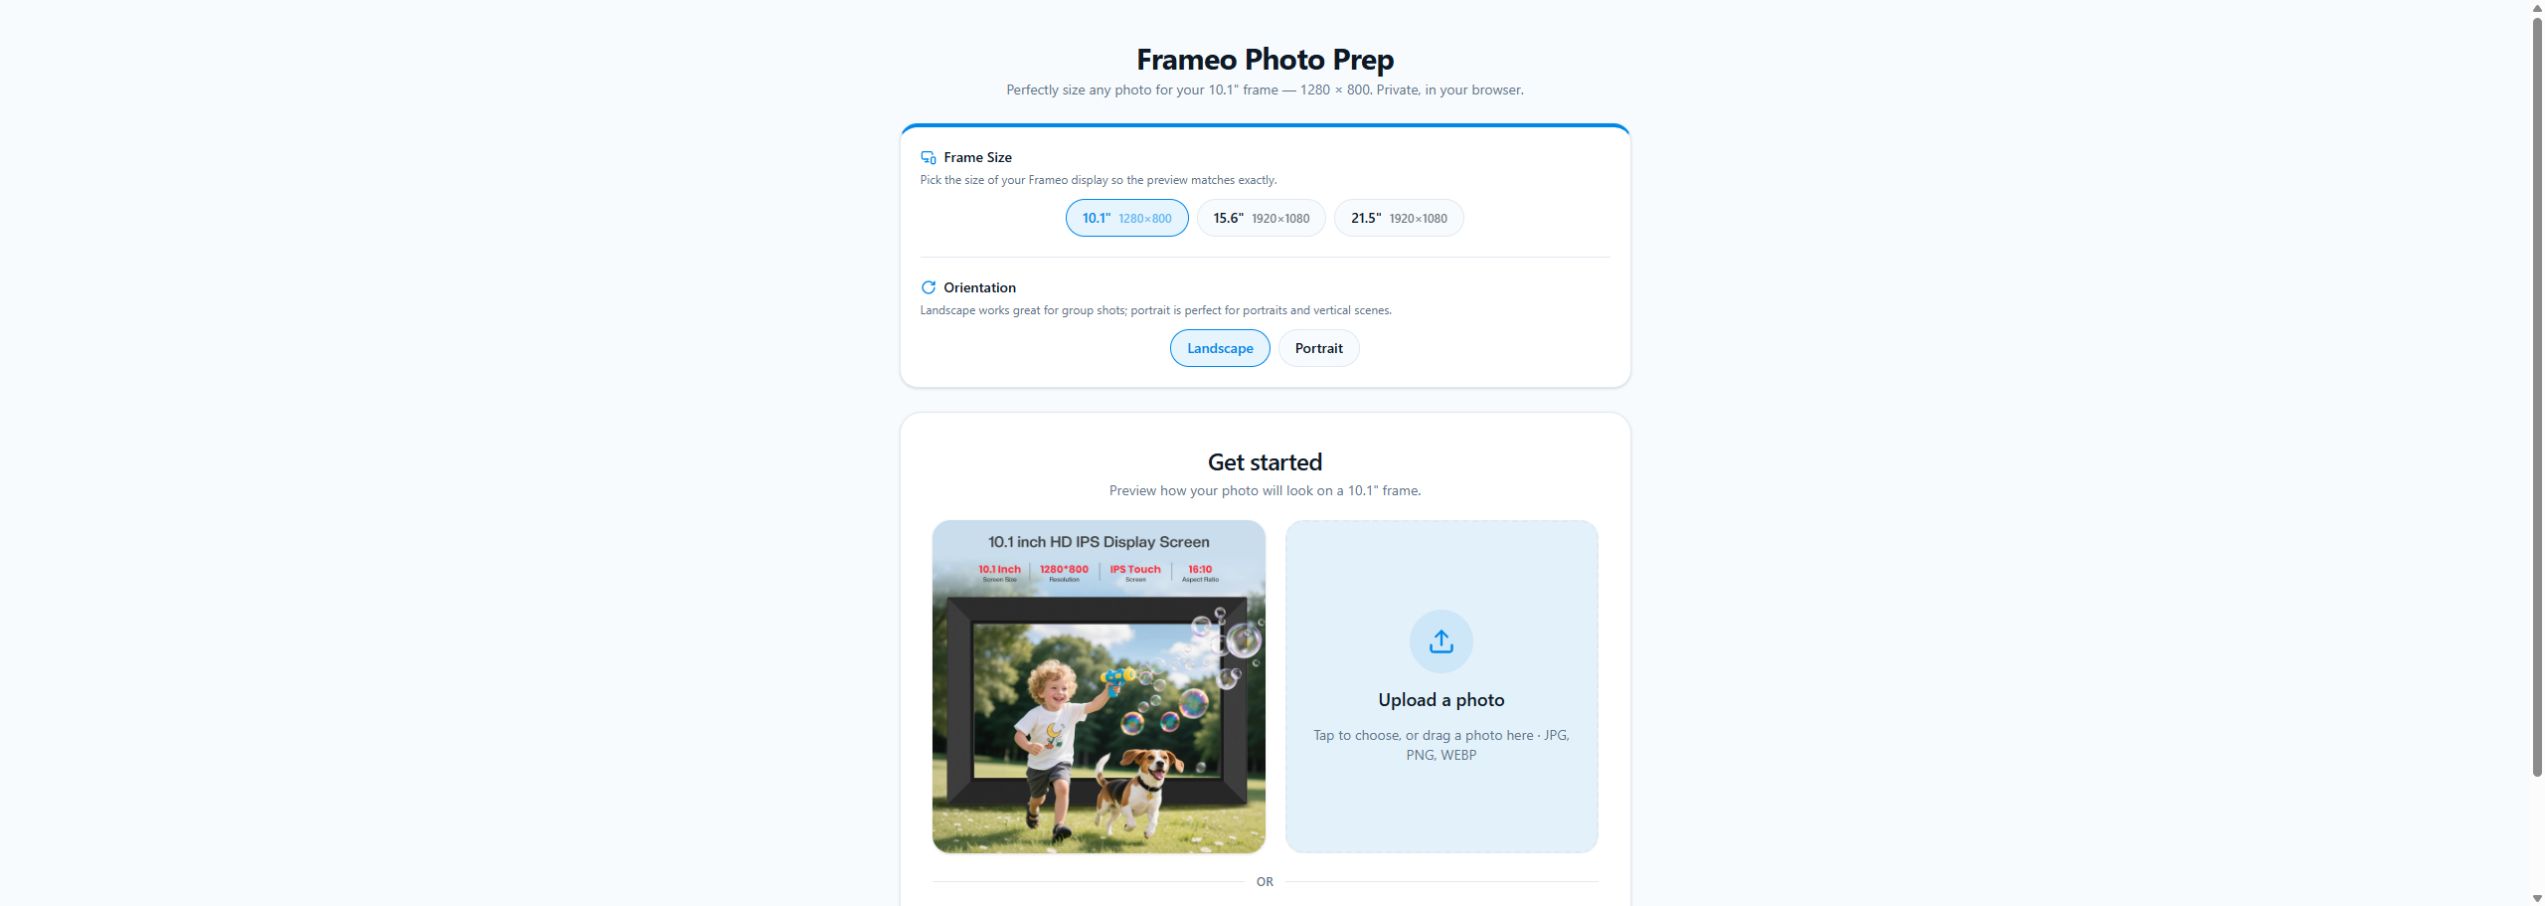
4. Prepare a photo with Frameo Photo Prep
Open the tool
Open Frameo Photo Prep in your browser using the link near the top of this guide. Nothing to install, no account to create.
Select the matching frame size
Pick 10.1 inch (1280x800), 15.6 inch (1920x1080), or 21.5 inch (1920x1080) so the on-screen preview matches your real display exactly. This choice also sets the pixel size of the file you export at the end.
Choose Landscape or Portrait
Match the way the frame actually sits on the shelf. Landscape suits group shots and scenery; portrait suits single subjects and tall scenes.
Add your photo
Upload a JPG, PNG, or WEBP file — tap the upload area or drag the file onto it. You can also start from a blank canvas if you want to build a simple text or graphic card instead of using a photograph.
Decide between Fill and Fit
Fill scales the photo until it covers the whole frame, which looks bold but trims the edges. Fit keeps the entire photo visible and fills the leftover space with a blurred version of the photo, a solid colour, or a pattern. Fit is the safe choice when nothing can be lost.
Position the photo
Drag to reposition, zoom gently, and rotate if the photo came in sideways. Zoom is the quiet enemy of sharpness — the less you enlarge, the crisper the result.
Protect the important parts
Keep faces, pets, captions, and meaningful edges well inside a comfortable safe area rather than hugging the border. Watch for any low-resolution warning the tool shows; it means the original is smaller than the frame needs, so back the zoom off or find a larger original.
Add decorations only if they help
You can layer text, emoji, arrows, speech bubbles, or a small image overlay. On a photo frame that runs all day, restraint wins — one short caption usually beats a collage of stickers.
Export the finished image
Export as JPG for ordinary photographs, or PNG when you have added text or graphics that need crisp edges. The preset you chose in step 2 determines the exported pixel dimensions, so the file is already the right size for the frame.
Prepare one photo, send it to the frame, and look at it on the real screen before you batch-prepare an album. Ten minutes of checking saves an hour of redoing.
Transfer the edited photos to your Frameo frame
Option 1: USB cable (Windows or Linux)
- 1.Connect the powered-on frame to the computer with a data-capable USB cable, not a charge-only cable.
- 2.On the frame open Settings → Manage photos → Transfer from computer, then enable Transfer from computer.
- 3.Open File Explorer or your computer's file manager, locate the frame, and open its DCIM folder.
- 4.Copy the edited JPG or PNG photos into the DCIM folder.
- 5.Wait until the frame finishes importing every photo. Do not unplug it during the transfer.
- 6.Safely eject or disconnect the frame once the import has completed.
Option 2: microSD card
- 1.Insert a compatible microSD card into the computer, using an adapter or card reader if needed.
- 2.Copy the edited photos onto the card. Use supported photo formats: JPG, JPEG, PNG, or WebP.
- 3.Safely eject the card from the computer, then insert it into the powered-on frame.
- 4.On the frame go to Settings → Manage photos → Import photos.
- 5.Select the photos, tap the Import or down-arrow icon, and wait for the import to finish before removing the card.
- 6.If the card is not detected, check your frame manufacturer's requirements. Most Frameo frames expect a card of 32 GB or less formatted as FAT32 — and remember that formatting a card erases everything already on it, so copy those files somewhere safe first.
Resizing and exporting photos at the frame's native resolution before transferring them keeps imports fast and uses far less storage on the frame than full-size camera files.
5. Send it to the Frameo frame
Open the Frameo mobile app
Install it on the phone or tablet you will send photos from, and make sure the phone and the frame are both on your home network.
Connect to the frame
Pair using the code the frame provides — Frameo calls it a friend or invite code, shown on the frame's own screen or settings menu.
Select the exported image
Choose the file you exported from Frameo Photo Prep, not the untouched original.
Review the crop screen
The app usually offers a crop or focal-point step before sending. Because your image is already frame-sized, keep it as-is and simply confirm the important subject is centred.
Add a caption and send
A short caption is optional and appears with the photo on many frames. Send when you are happy.
Confirm on the physical frame
Walk over and look at it. Check the edges, the faces, and the brightness from normal viewing distance.
Some frames, including many 15.6-inch models, can import photos from an SD card or USB drive. Use that route only if your own model supports it — copy the exported files onto the card, insert it, and import from the frame's menu.
6. Quick composition tips
- Keep faces slightly away from the extreme edges of the frame.
- Give group photos extra room so nobody sits on the border.
- Avoid tiny text; a frame is read from across the room.
- Match the photo orientation to the frame orientation whenever possible.
- Use Fit when edge details are irreplaceable.
- Use Fill when you want full-screen impact and can spare the edges.
- Test one image before preparing a large batch.
- Keep the untouched original photo somewhere safe.
7. Troubleshooting
8. Privacy and limitations
Tutorial Forge, Frameo, Lovable, Amazon, and any hardware seller are separate services with their own terms. This guide is educational and is not an official Frameo manual. Features and menus can change with app and firmware updates.